Wednesday, September 26, 2012

Blog has re-homed

Just a quick update to let readers know this blog has re-homed. This blog will remain here for posterity but it will now longer be receiving updates. This blog in the future is accessible at the link below

Kruger Heavy Industries - Devlog

Thursday, December 8, 2011

Unity3D iPhone Player and JIRA Connect Integration

We've been using JIRA internally for our project management and bug tracking for a couple of years now and we've found it to be excellent. Recently Atlassian (the developers of JIRA) released a JIRA Connect library for the iPad/iPhone family.

If you are developing an iPad or iPhone application this library gives you application bug and error reporting, which integrates with JIRA for very little effort.

Using JIRA Connect with Unity3D iPhone together in order to provide a nice way of automatically delivering crash reports and user feedback to your Unity application. For Unity users targeting the iPad/iPhone this quick little boon works for us to. Here is how to do it.

At this point of this post I'm assuming you're familiar somewhat with JIRA and have a working JIRA instance, or are perhaps using the hosted JIRA solution offered by Atlassian (we much prefer to host our own - because we like control like that).

In your JIRA instance; enable the JIRA Connect plugin, the JIRA Connect user and get your API Key from the Administration panel.

Go and download the JIRA Connect source from here.

To get this integration working for Unity iPad/iPhone builds we're going to patch the Unity player source code that gets spat out
by Unity when you make a Unity iPad/iPhone build.

To have a starting position; make a Unity iPad/iPhone build now. Typically, if I have a project directory "ProjectName" I output my iPad/iPhone player build to "ProjectName_build". Generate this now.

Unpack the JIRA Connect source code you have downloaded.

At this point my directory looks like something like (I'm using OSX Lion)


leberkaese: chriskruger$ ls
atlassian-jiraconnect-ios-tip
ProjectName
ProjectName_build
leberkaese: chriskruger$


Open the Xcode project file in your ProjectName_build directory in Xcode. I am using Xcode 4 btw.

We are now going to make some changes to the project that Unity has spat out for us, in order to make use of JIRA Connect. We're basically following the instructions from here.

So the steps as I see them for Xcode 4.


  1. Add the JMCClasses directory to your Unity-iPhone/Classes group. Right click on the Classes group and choose to Add Files to Unity-iPhone. Browse to the atlassian-jiraconnect-ios-tip/JIRAConnect and choose the JMCClasses directory. Select to "make groups for any added folders" and press Add

  2. Select the Unity-iPhone project root in the project explorer, select the Unity-iPhone target and the Summary tab. Scroll down to the Linked Frameworks and Libraries. Add the following libraries for linking, CFNetwork, SystemConfiguration, MobileCoreServices, CoreGraphics, AVFoundation, CoreLocation, libsqlite
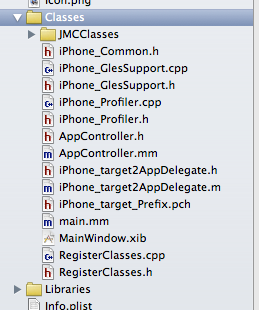


Choose the AppController.mm file in the Classes directory. We're going to edit this to integrate JIRA Connect.

Near the top of AppController.mm we'll add the import statement


Now move down further in the AppController.mm file and find the ApplicationDidFinishLaunching method. We're going to add the follow code in order to activate the library code when our application starts. Note that you'll need to alter this code from my example code in order for JIRA Connect to work with your JIRA instance. Specifically you'll need you JIRA instance's web address and it's API key. You might also want to change the configurations options to suit.

When done applicationDidFinishLaunching will look something like this.


- (void) applicationDidFinishLaunching:(UIApplication*)application
{
printf_console("-> applicationDidFinishLaunching()\n");

JMCOptions* options = [JMCOptions optionsWithUrl:@"https://project.jira.com/"
project:@"PK"
apiKey:@"XXXXXXX-XXXXX-XXXX-XXX-XXXXXXXXXX"
photos:NO
voice:NO
location:NO
crashreporting:YES
customFields:nil];

[[JMC instance] configureWithOptions:options];


if ([UIDevice currentDevice].generatesDeviceOrientationNotifications == NO)
[[UIDevice currentDevice] beginGeneratingDeviceOrientationNotifications];

[self startUnity:application];
}


We were particularly interested in the crash reporting, so for the most part that's all we setup.

So if you've done this. Check it all compiles and your Unity application still runs.

If it all works we're now in a good position to generate some patches that we'll use to automatically update our Unity build from each time we make a build in Unity.

Create another build outputting it to somewhere like ProjectName_build_vanilla.

Create a some patches using diff.


diff -ru ProjectName_build_vanilla/Unity-iPhone.xcodeproj/project.pbxproj ProjectName_build/Unity-iPhone.xcodeproj/project.pbxproj > xcode.patch

diff -ru ProjectName_build_vanilla/Classes/AppController.mm ProjectName_build/Classes/AppController.mm > AppController.patch


Move these patches to ProjectName/Assets/Editor where they can easily be accessed during the Unity build process.

Now we're going to modify the Unity build post process to apply our patches every time we make a build. So, if it doesn't already exist we will create a file called ProjectName/Assets/Editor/PostprocessBuildPlayer. This file is the standard way Unity permits modifications to the build pipeline.

The contents of our PostprocessBuildPlayer file looks like.


#!/bin/bash

DIR=${0%/*}
INSTALLPATH=${1}
TARGET=${2}
OPT=${3}
COMPANY=${4}
PRODUCT=${5}
LOG=postprocess.txt

echo "Postprocess Start" > ${LOG}
echo "TARGET = ${TARGET}, PRODUCT = ${PRODUCT}" >> ${LOG}
echo "INSTALLPATH = ${INSTALLPATH}" >> ${LOG}

if [ $PRODUCT == "ProductName" ]
then

if [ "${TARGET}" == "iPhone" ]
then
echo "Applying patches for AppController and Xcode" >> ${LOG}
(cd ${INSTALLPATH}; patch -N -p1 < ${DIR}/AppController.patch)
(cd ${INSTALLPATH}; patch -N -p1 < ${DIR}/xcode.patch)
fi

fi


It is just a quick and dirty bash script that applies our patches to the Unity iPad/iPhone player build every time we do a build. Once you've got this working you're now got JIRA Connect integrated into your Unity application.

If you have trouble getting the JIRA Connect library working, define "DEBUG" in the build and the JIRA Connect library will log more information (to the Xcode console) about that it is trying to do when the application starts. This will help you work out what is wrong.

Hope this works for you and please do lets us know if this guide needs updating/error correcting.

Thursday, October 20, 2011

Unity 3D (Pro): View matrix (separately) for CG shaders

As Unity's shader support is largely based on Open GL, there isn't, by default design, access to separate model and view matrices in shader code. Occasionally you might want access to this and to use it you'll need to pass this information in yourself.

Just a quick summary of what Unity does provide in Shader code.


  • UNITY_MATRIX_MVP - Current model * view * project matrix

  • UNITY_MATRIX_MV - Current mode * view matrix

  • UNITY_MATRIX_P - Current project matrix

  • _Object2World - Current model matrix

  • _World2Object - Inverse of current world matrix


Very occasionally I wish there was a UNITY_MATRIX_M and UNITY_MATRIX_V but there isn't - at least - not yet. (Same limitation in GLSL)

In C# we can get the view matrix from Camera.mainCamera.worldToCameraMatrix and for GameObjects the model matrix can be generated by using Matrix4x4.TRS( transform.position, transform.rotation, transform.localScale).

If we wanted to pass in our own modelView matrix we could do


Matrix4x4 modelViewMatrix = Camera.mainCamera.worldToCameraMatrix * Matrix4x4.TRS( transform.position, transform.rotation, transform.localScale);


Then at the appropriate point we can do


material.SetMatrix("modelView", modelViewMatrix);


To pass this model view matrix into our shader.

In our shader, presumably in the vertex shader we can then use this value like so


v2f vert(appdata_base v) 
{
v2f o;
o.pos = mul( mul(UNITY_MATRIX_P, modelView), v.vertex );
return o;
}


The result of the above code is exactly the same as


o.pos = mul( UNITY_MATRIX_MVP, v.vertex );


So now knowing this you can manipulate and/or use the model and view matrices separately in your shaders if you so choose, by first passing them in from script code.

Tuesday, October 11, 2011

Moving iPhone Developer Credentials from one Mac to another

Update: So apparently in Xcode 4 (at least) there is an official way to do this... outlined here

I recently reinstalled OSX on my Mac and upgraded to Lion. Of course I forgot to transfer my iPhone developer credentials before I did it. I had to go back to the provisioning portal and setup my new certificate and get a new developer profile. While it wasn't a huge time waste I should have transferred my certificates and profile to save myself some time.

This is what I should have done.


  • Open Xcode

  • Window->Organizer
  • DEVELOPMENT -> Provisioning Profiles

  • Choose your Provisioning profile, right click and "Reveal in Finder"

  • Save the resulting file

  • Open Keychain Access

  • Export your private and public certificates to files and save them

  • Transfer all the file to your new system

  • Drag and drop Provisioning Profile into Xcode's Organiser on your new system

  • Import the certificates file you exported into Keychain Access on your new system


NOTE: There is a very annoying bug in Keychain Access that means you need to re-import your certificates at the command line. Attempting to you import you certificates using the Keychain Access GUI yields "An error has occurred. Unable to import an item. The contents of this item cannot be retrieved". This is just a blatant bug in Keychain Access you can import the files into Keychain Access at the command line with the following commands.

security import priv_key.p12 -k ~/Library/Keychains/login.keychain
security import pub_key.pem -k ~/Library/Keychains/login.keychain

Thursday, August 4, 2011

Xcode 3.2.6 and OSX Lion (10.7) - Make it install

Today I enthusiastically installed OSX Lion on my development system. I was probably stupidly naive to think it would be a straightforward upgrade.

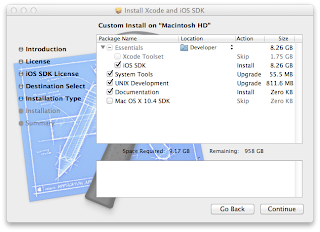
Attempting to install Xcode 3.2.6, the version I currently prefer, it seemed to silently fail. I wasn't sure why. I did notice running the installation wizard; that at the point of selecting Installation Components the Xcode Tool Set component (Usually compulsory) was greyed out and marked as skip.


After some research, It seems support for Xcode 3.2.6 on Lion is somewhat neglected as Xcode 4.x is the future. Long story short I needed to use 3.2.6. It can be motivated to install on Lion.

After mounting the developer tools dmg you can open a terminal and issue the following commands to successfully install Xcode 3.2.6 on OSX Lion (10.7)

export COMMAND_LINE_INSTALL=1
open "/Volumes/Xcode and iOS SDK/Xcode and iOS SDK.mpkg"

Unity3D Asset Server: Best Practice Workflow - Initial Checkout

Using Unity in teams one is often stuck using Unity asset server. While it certainly lacks features one has grown accustomed to in many other source control systems the fact remains that it is the solution that most seamlessly works with Unity.

I think part of making the process of working with Unity Asset Server more enjoyable (apart form having experience with it) is to stick with some simple best practices.

Checking out a Unity project for the first time


  • Find out what the project is called. You can do this looking looking at the server via another project.

  • When opening Unity - choose to "Create new project". Give it the same name as the project is know by in asset server.

  • Open this new project and connect to the server (ALT-0 or CMD-0 depending on operating system)

  • Identify the project you are checking out and connect to it

  • Choose to Update

  • You'll be asked to make a decision about conflicting assets. Make sure you discard all existing files in the new project ("Discard My Changes"). This seems a little unintuitive but it makes sure you won't clutter your project or accidentally suck in unwanted files.

Thursday, July 21, 2011

Tell (automake) configure to use specific architecture on Mac OSX

Where we want to build 32 bit binary on OSX, and we know the codebase has a mix of C and C++ code.

ARCHFLAGS="-arch i386" CFLAGS="-arch i386" CPPFLAGS="-arch i386" LDFLAGS="-arch i386" ./configure